
We may earn a commission from links on this page.
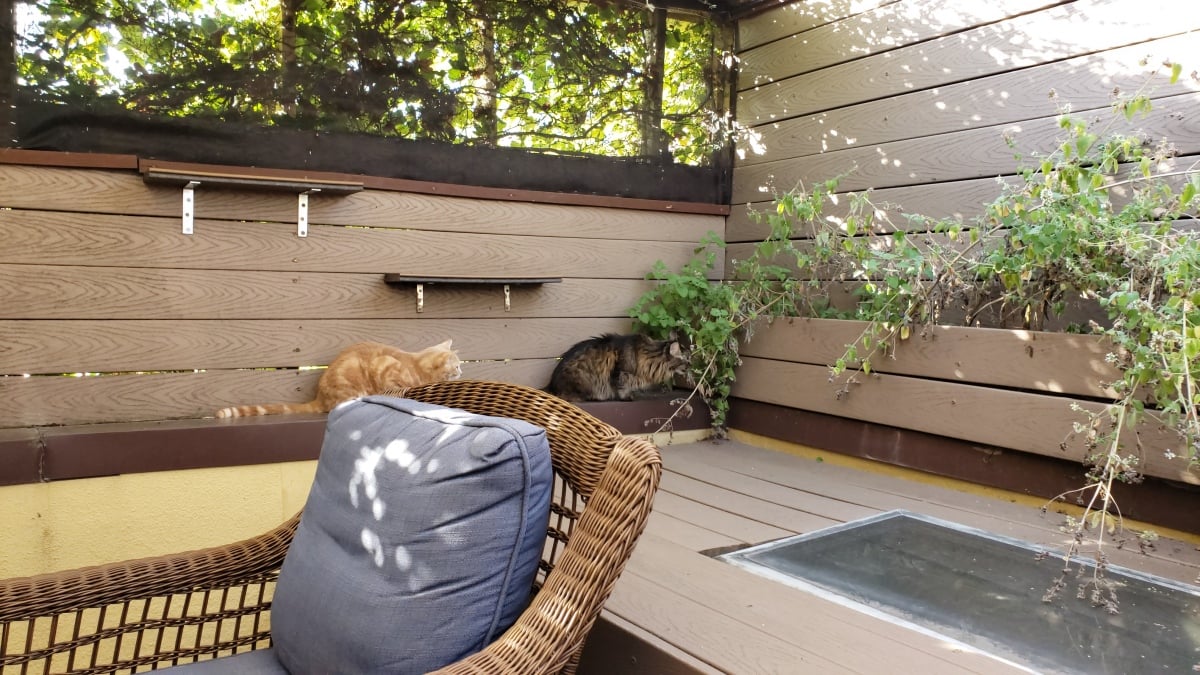
Wide view of my deck.
Credit: Jeff Somers
My wife and I live in an urban area where outdoor space is at a premium, so I consider our home’s second floor roof deck one of its standout features. It’s sunny and relatively private—and, crucially, it’s outdoor space in a city where a Juliet balcony is often the best you can do.
There are two downsides to the space, however. One is that it is plagued by bugs, especially since one of our neighbors began hosting the dreaded spotted lanternfly like they were protecting an endangered species. The other is that our cats love being on the deck, but also love launching themselves over the fence to explore the neighborhood. (Did I mention this deck is on the second floor? You haven’t lived until you’ve hunted down a lost cat across your neighbors’ roofs.)
The solution, for us, was to screen in the deck. First, I built a simple frame to extend the railings up a few feet, and created a pergola-like set of rafters going across to support a screen. Here’s what it looked like at that point:
Framing on my deck.
Credit: Jeff Somers
But how to actually enclose it? I could have just stapled screen to the framing, but that would lead to a problem in the winter, when the “roof” would be laden with snow. I’m pretty good with a power drill and some pressure-treated 2x4s, but I don’t think my screen-roof would’ve held several feet of New Jersey snow, so my screen needed to be easily removable (and replaceable).
The solution was a DIY screen-in kit from Screeneze
After some research, I found the solutions: A screened-in porch kit from Screeneze. It’s a simple concept: You attach an aluminum base to the perimeter of whatever opening you’re screening in, stretch your screen over the base, and lightly hammer a vinyl cap on top to secure the screen in place without staples. When you need to, you can easily pry off the caps with a flathead screwdriver and remove or replace the screen.
Once installed, the base of the kit looks like this:

Closeup of SCREENEZE base.
Credit: Jeff Somers
and the caps look like this:

Close up of SCREENEZE cap.
Credit: Jeff Somers
The aluminum base is easy to cut to size using a hacksaw or metal snippers, and the caps can be cut with a utility knife or even a decent pair of scissors, so you can customize the size of your screened area. They come in four basic colors (bronze, sand, white, and clay).
What do you think so far?
The installation process was also pretty simple: I measured the perimeter, bought the necessary number of base and caps, and cut my bases to the correct lengths. You don’t have to make them exactly as long as the space you’re screening—you can cut them into smaller, more manageable lengths and attach them end-to-end, making sure you line them up so the caps can go across seams if necessary. This is especially helpful for the caps, as I found trying to hold them in place so I could hammer them home was a challenge, as they are quite bendy. Cutting them into shorter lengths made them a lot easier to work with.
The kit comes with all the self-tapping screws you’ll need, so you can slap the aluminum base up pretty fast. Then you just need some screen—I bought an enormous roll of the stuff from Phifer BetterVue, because it’s proved to be durable, attractive, and easy to work with.

My rumpled supply of screen.
Credit: Jeff Somers
I cut lengths to cover the horizontal openings, and attached the screen to the top base first. That made it easy to go back, stretch the screen down, and attach the bottom and side caps, giving me a nice, tight screen that won’t block the view (or the sun). Next, I cut two large sections of screen to cover half of the “roof,” attached them to the sides using the caps, stretched them to the center, and attached them to the front and back of the deck (it was hard to stretch the top screen tightly, especially because there’s no base or cap running down the center line, so it remains a little loose, but it still does the job.
Here’s what it looks like fully installed:

The finished screen.
Credit: Jeff Somers
Screening in the deck made it the ideal outdoor space
So how’d it turn out? Terrific. Screening in the porch means:
-
There are no bugs. Every once in a very long while, a winged insect makes its way into the deck area, but it’s very rare. And I haven’t seen a spotted lanternfly back there in a loooong time (though I still see them everywhere else, because, again, one of the neighbors seems determined to be a refuge for them).
-
Pets can hang out there. I no longer have to worry about cats escaping into the neighborhood, and I don’t have to feel guilty about preventing the furry idiots from enjoying our outdoor space. They can lounge around as much as they like—they enjoy climbing the screen like spidercat, too. Maybe a bit too much.
-
The screen doesn’t block the sun, so it’s still a bright, pleasant place to hang out, grill, or do whatever else.
-
It’s easy to remove and reinstall. When the weather turns, I can pry off the caps and roll back the screen in about ten minutes, so I don’t have to worry about snow loads destroying everything. And when the screen gets torn, I just undo that section and pop in a fresh screen, a process that takes five minutes at most.
The Screeneze kit has lasted years, through some pretty gnarly weather, and it’s still in almost-new shape. If you’ve got a deck, pergola, or porch, screening it in can make a more enjoyable and more useful space, and this kit will make doing that a fairly simple job.
